

Whether you’re a content creator, marketer, educator, or just exploring voiceover tools for the first time, knowing how to use Murf AI can seriously streamline your workflow. In 2025, Murf AI continues to be one of the most accessible and high-quality AI voice generators available—used by individuals and companies for podcasts, presentations, YouTube videos, and even audiobooks.
This blog will walk you through how to use Murf AI step by step. No fluff, no jargon—just a practical guide so you can get your first voiceover project done today.
What is Murf AI?
Before diving into how to use Murf AI, let’s quickly cover what it is and why it’s worth your time.
Murf AI is a cloud-based, text-to-speech platform that turns written content into realistic AI-generated voiceovers. It offers:
- Over 120 voices in 20+ languages
- Voice customization (pitch, speed, emphasis)
- A user-friendly studio for script editing and media syncing
- Voice cloning (in Pro plans)
- Team collaboration tools
You don’t need voice acting experience or editing skills. If you can type, you can create with Murf.

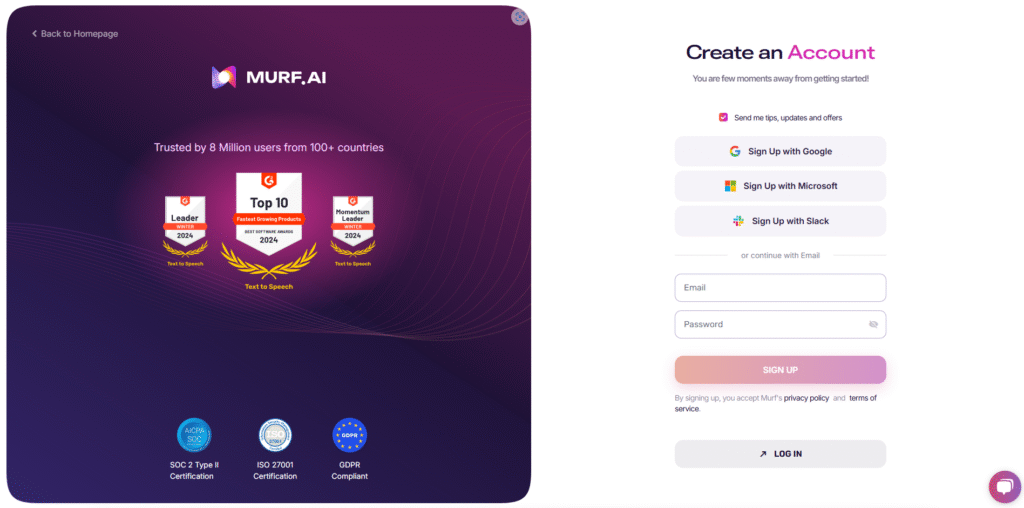
Step 1: Sign Up and Log In
To begin learning how to use Murf AI, start with a free account:
- Visit MurfAI official website
- Click “Sign Up” and register using Google, Apple, or your email.
- Choose the Free plan to explore the platform before upgrading.
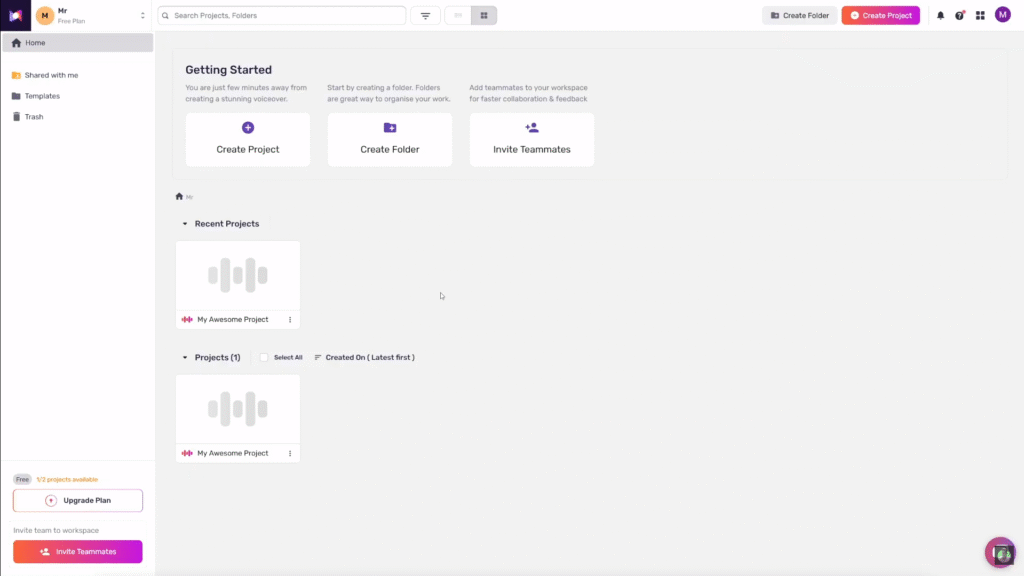
Once you’re signed in, you’ll land in the Murf Studio dashboard.
Step 2: Create a New Project
Inside the Murf Studio, click the “Create Project” button in the top right.
- Give your project a name (e.g., “Explainer Video”)
- Select your preferred language
- Click “Create”
This opens a clean, timeline-based editor that works much like a simplified video editing tool. This is where the real magic of how to use Murf AI starts.
Step 3: Add Your Script
Now that your project is ready, you’ll see an input area where you can type or paste your script. Each paragraph or sentence becomes a block in the timeline.
Tips for better results:
- Break long text into smaller segments
- Use punctuation naturally—it affects pauses and tone
- Avoid slang or shorthand unless you want casual delivery
Once your text is in, Murf automatically assigns a default voice to it. But you can easily change that in the next step.

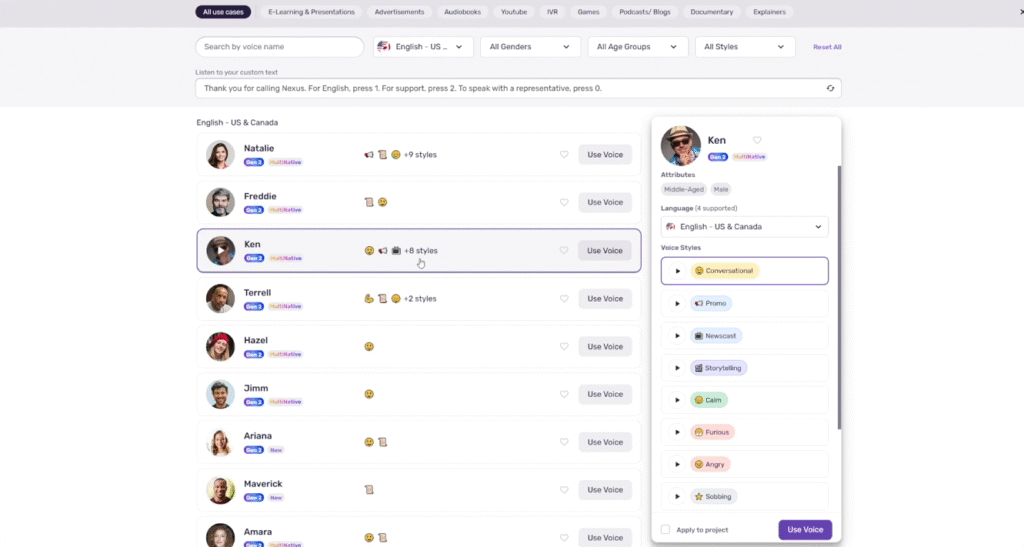
Step 4: How to Use Murf AI to Choose the Right Voice
To master how to use Murf AI, you need to know how to pick the right voice. The platform offers a wide range of voice profiles sorted by:
- Gender
- Tone
- Language/Accent
- Use-case (e.g., conversational, corporate, educational)
- Click on a text block
- Choose a voice from the right-side panel
- Click “Preview” to hear a sample
Don’t be afraid to experiment. Some voices are better suited for YouTube content, while others sound more professional for eLearning or corporate training.
Step 5: How to Use Murf AI to Customize Voice Settings
This is where how to use Murf AI really gets fun. Each voice comes with built-in customization options:
- Pitch: Adjust the vocal tone higher or lower
- Speed: Control how fast or slow the voice reads
- Pause: Insert natural breaks between words or sentences
- Emphasis: Make certain words stand out more
To apply changes:
- Highlight the word or sentence
- Click the desired effect (e.g., emphasis or pause)
- Preview and tweak until it sounds right
These subtle tweaks can dramatically change how engaging your final voiceover sounds.
Step 6: Add Music or Media (Optional)
Murf Studio lets you enhance your voiceover with background music or images/video (great for presentations or video content).
- Go to the Media tab on the left
- Upload your own file or use Murf’s free music library
- Drag and drop the audio onto the timeline below your script
You can sync your narration with slides or visuals directly inside the editor. Knowing how to use Murf AI for audio-video syncing can save hours of editing time.
Step 7: Preview Your Project
Before you render your project, use the Preview button to listen to your voiceover from start to finish.
Watch for:
- Awkward pacing
- Incorrect pronunciations
- Voice or background audio clashes
Make sure everything flows smoothly and sounds natural. This is a critical step in mastering how to use Murf AI effectively, especially if you’re creating content for an audience.
Step 8: Render and Export
Once you’re satisfied:
- Click “Build Audio” in the top right corner
- Wait for Murf to process your project (usually just a few seconds)
- Click Download to get your final audio in MP3 or WAV format
If you’re using visuals, you can also export a full video with synced voiceover and slides.
Note: Free accounts add a watermark and don’t allow full downloads. To unlock everything, upgrade to a paid plan starting at around $19/month.
Step 9: Reuse, Repurpose, and Share
Now that you’ve learned how to use Murf AI, your finished audio/video can be used anywhere:
- Narrate YouTube videos
- Add to podcasts
- Enhance eLearning courses
- Share in marketing campaigns
- Use as narration in explainer animations
Because Murf saves your projects in the cloud, you can duplicate and edit previous scripts anytime, making it easy to create variations or localizations.
Common Questions About How to Use Murf AI
Can I clone my own voice?
Yes, but only with the Enterprise plan. You’ll need to submit clear recordings and get approval.
Is Murf good for YouTube narration?
Absolutely. Many YouTubers use it to save time and maintain consistent narration tone.
Is Murf better than ElevenLabs?
Different tools, different strengths. Murf shines in user interface, media integration, and variety of built-in voices, while ElevenLabs focuses on emotional realism.
How accurate is pronunciation?
Very accurate overall, with options to phonetically adjust tricky words if needed.
Final Thoughts
Learning how to use Murf AI isn’t just about using a tool—it’s about giving your content a voice (literally). Whether you’re a solo creator or a part of a bigger team, Murf makes voiceover creation surprisingly fast and effective.
The beauty of it? You don’t need to hire a voice actor or spend hours in a recording booth. With just a script and a few clicks, you can bring your message to life.

[…] Learn how to get started with MurfAI […]